Create A P.O. To Send Your Inventory
Learn how to generate a Purchase Order (P.O.), which is how you send ShipBots your product directly from any vendor to add to the warehouse Inventory.
Introduction
Efficient inventory management starts with a clear process for creating Purchase Orders (P.O.s). ShipBots offers a user-friendly platform for this critical task.
This guide details how to generate a P.O., which is how you send ShipBots your product directly from any vendor to add to the warehouse Inventory.
Navigating to Purchase Orders
To begin, under the
Purchase Orders tab, click on All Purchase Orders from the dropdown menu. This is where you'll create new P.O.s and manage existing ones.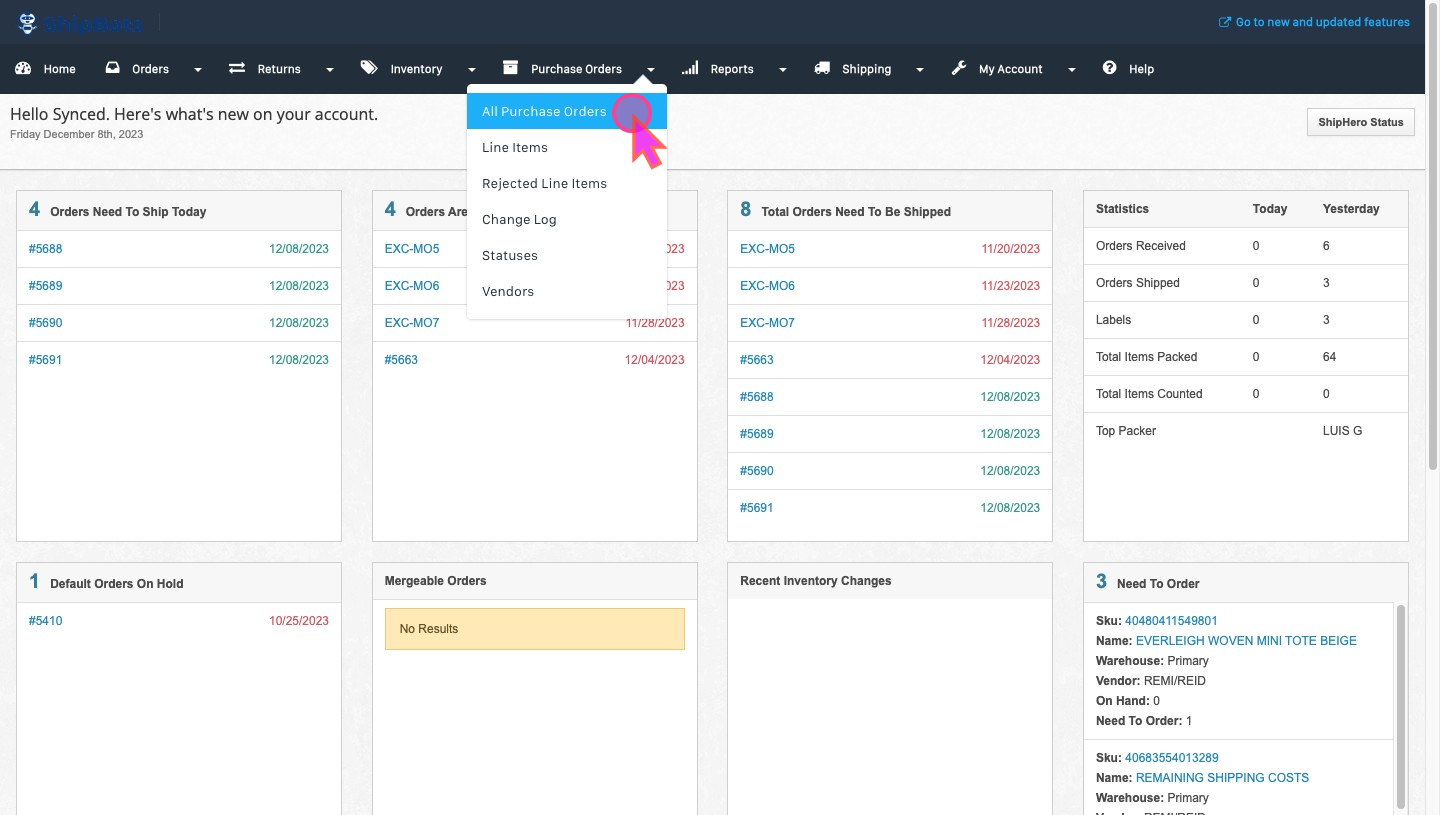
Initiating a New Purchase Order
Click the
Create a Purchase Order button. This action opens a form to enter P.O. details.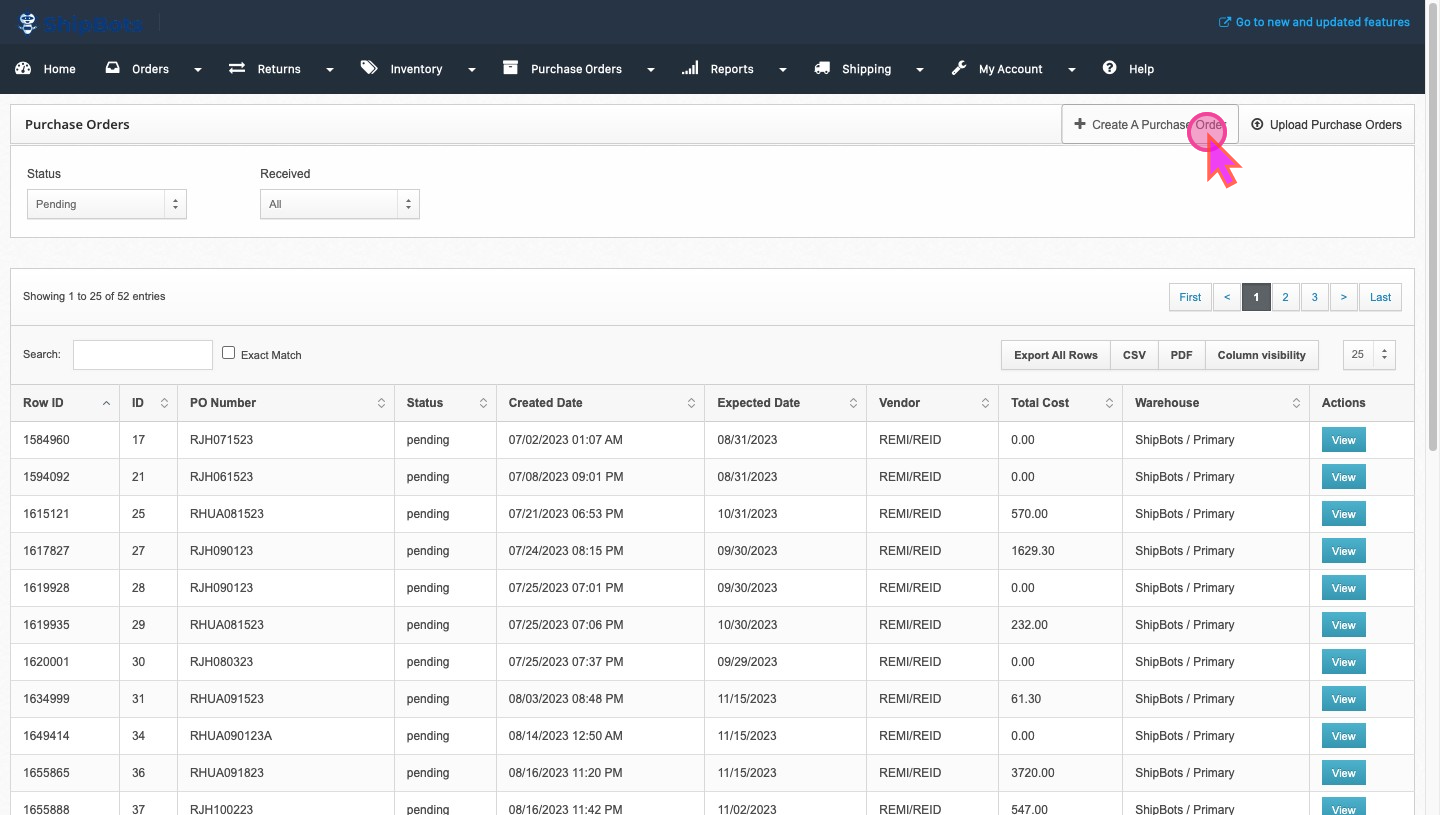
Selecting a Vendor
Choose a vendor from the dropdown list.
If you're the supplier, select your account name to indicate you're the inventory source.

Specifying the Warehouse
Select
ShipBots - Primary or your relevant warehouse from the list to ensure correct inventory placement.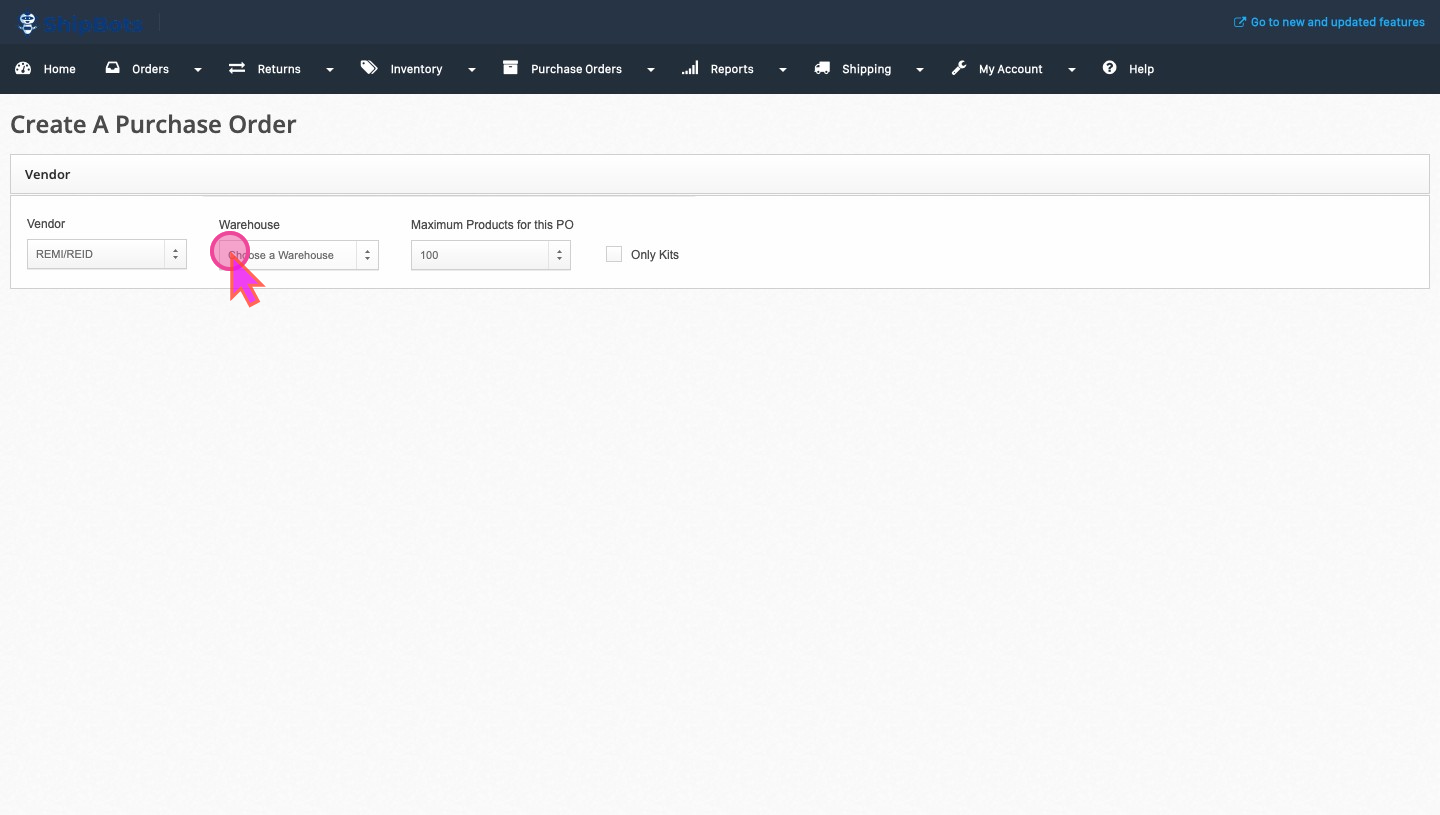
Adding Products
Type the product name or SKU in the
Products section’s search. Select the correct item from the suggestions. If an item isn't listed, verify its presence in your inventory system first.Repeat the product addition steps for each item.

Determining Quantities
After selecting a product, input the desired quantity. To allow pre-orders before stock arrives, set a
sell ahead quantity.If your manufacturer uses a different SKU, enter it under
Manufacturer SKU. 
Managing Multiple Products
If a shipment has multiple boxes, use one master tracking number. Create separate P.O.s for distinct shipments.
Reviewing and Saving
Check all details for accuracy, then hit
Save. This step is crucial to inventory tracking and accuracy.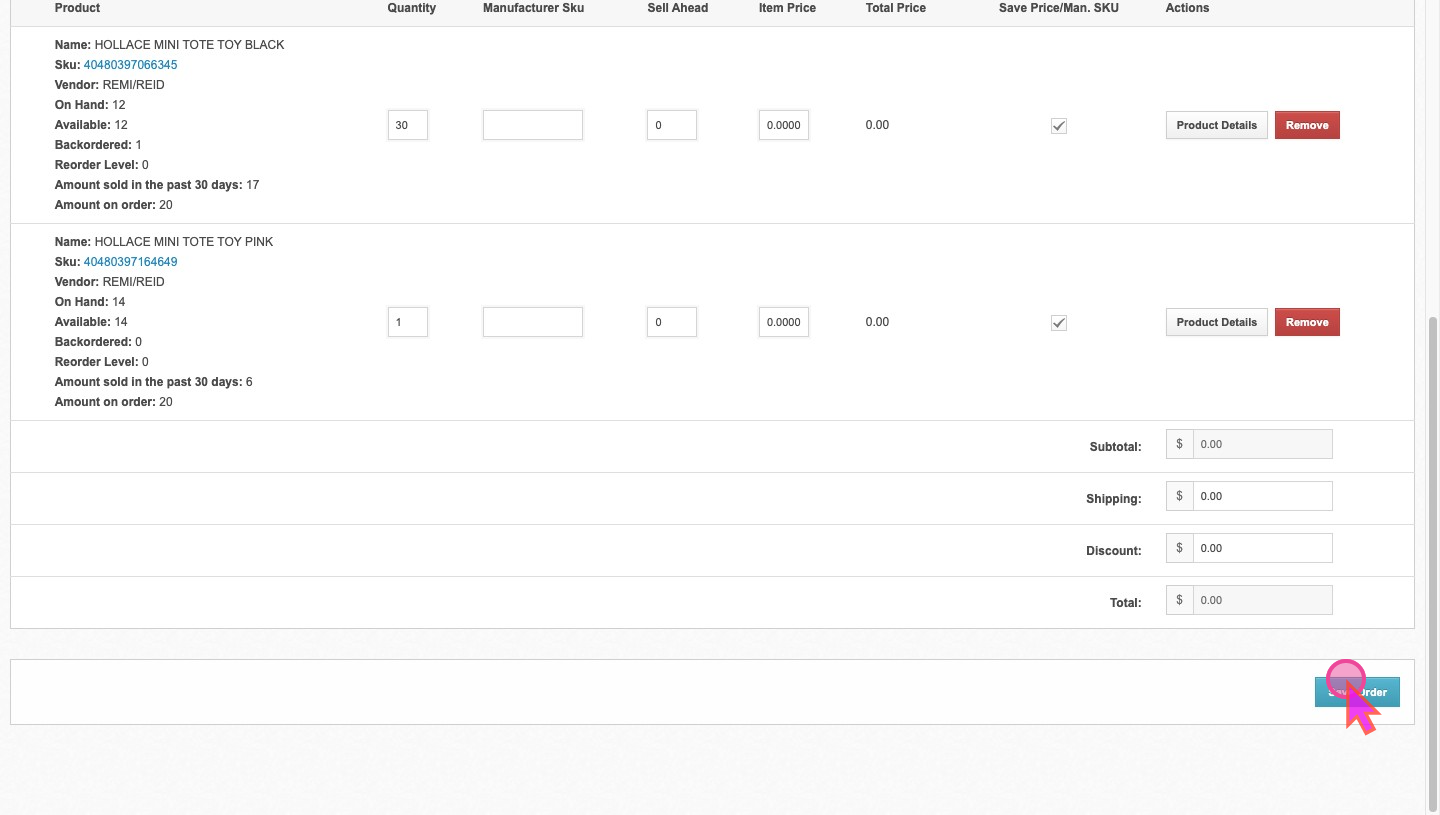
Editing a Purchase Order
A new Purchase Order will be generated where you can edit some details. If changes are needed, select the P.O. from the list, make edits, and save again.
On the right, you'll notice a fixed
PO ID and an editable PO Number to align with your supplier's PO number or to make one that's memorable for you. Remember to hit the Save button to lock in your updates.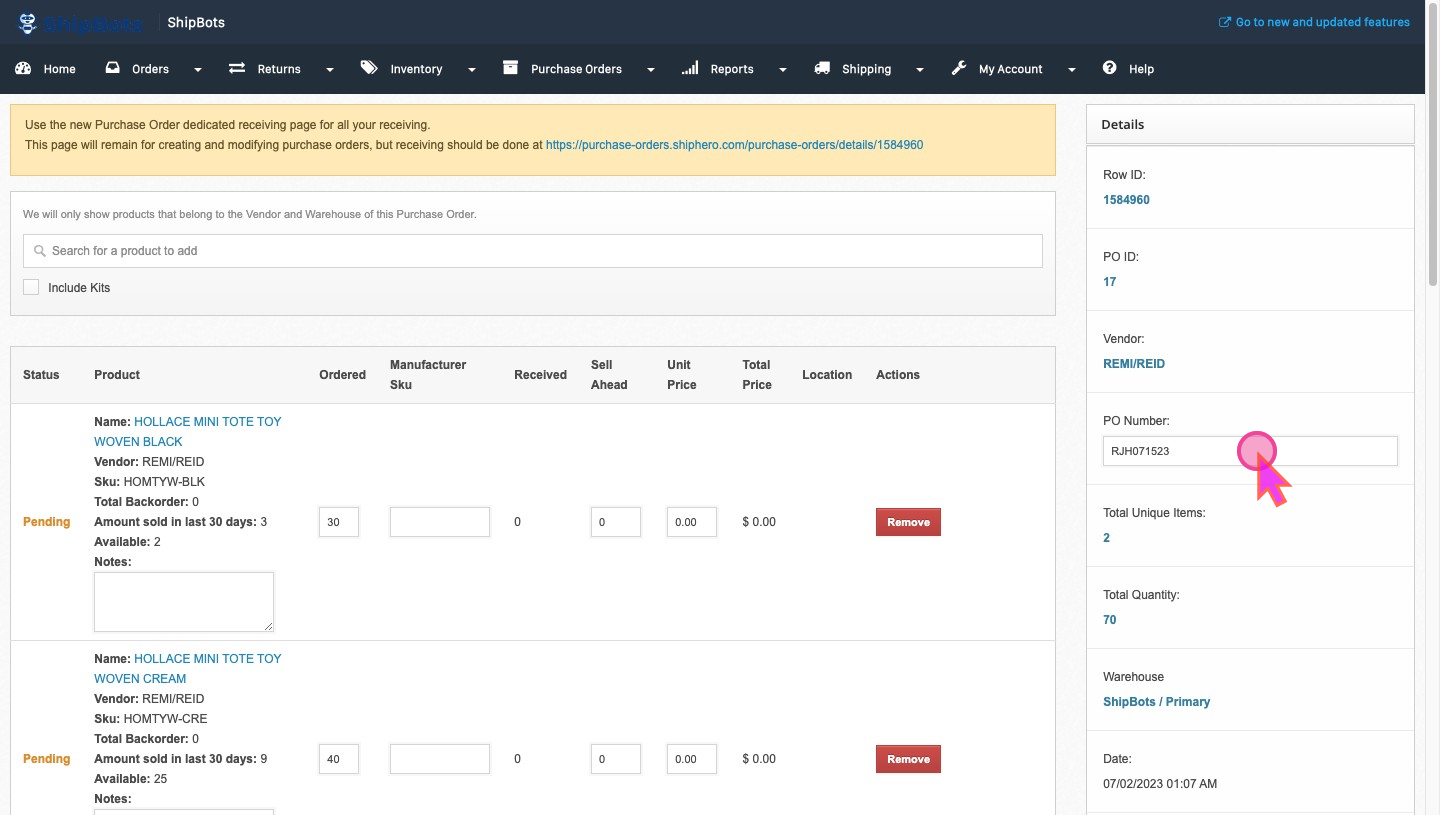
Adding Tracking Information
Add the tracking number provided by your supplier to the P.O. as soon as possible. For drop-offs, enter
Drop Off in the tracking field to maintain accuracy. 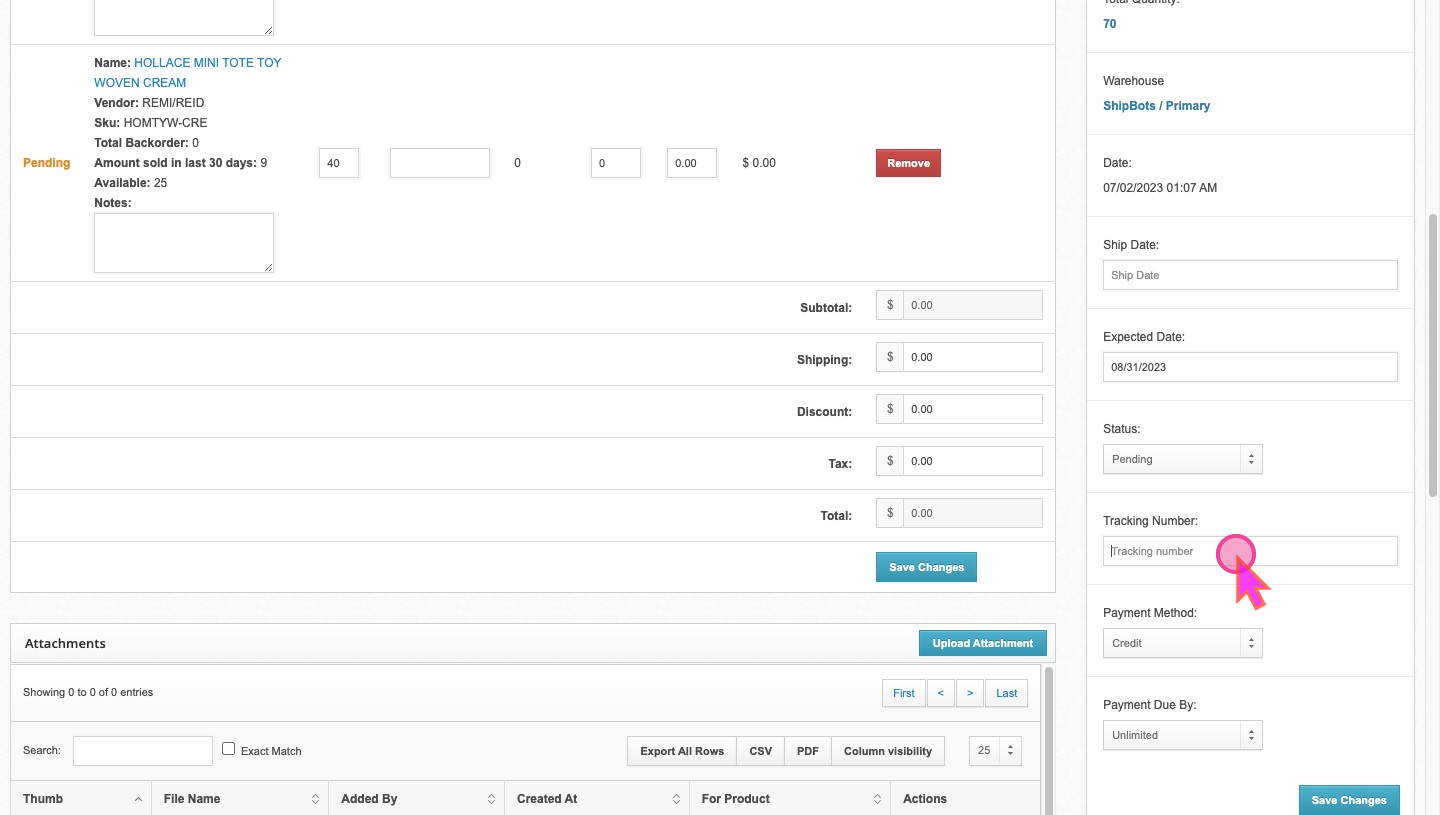
Intimate ShipBots When it will get the Product
Remember to Intimate ShipBots about when to expect the delivery.
See how to Schedule A Drop-off to the Warehouse
With these steps, creating a P.O. in ShipBots should be straightforward. Regularly save your work and update tracking information promptly to keep your inventory management on track.
Best Practices:
Before adding products, confirm they're listed in your ShipBots inventory. Edit P.O.s before receiving items to avoid inventory issues. If errors arise, check product details and consult ShipBots’ support if needed.
Did this answer your question?