Add or Remove Product from Vendor
Learn How to Add and remove Product and Vendor connection.
Introduction
This guide provides step-by-step instructions on how to add or remove products from vendors using two different methods in our application.
Method 1 - Via Vendor Detail Page
Navigate to Vendor Page:
Click on the
Vendor link under the Purchase Orders section and then Search a Vendor and Select View to see Vendor details Page which also shows the products that it carries.
Select and Add a Product:
To add a product, click on the input field labeled
Search for a product to add and type the product's name.
Now you can choose the desired product from the search results.
Edit a Product:
Click on the
Edit link to modify Product Details 
Delete a Product:
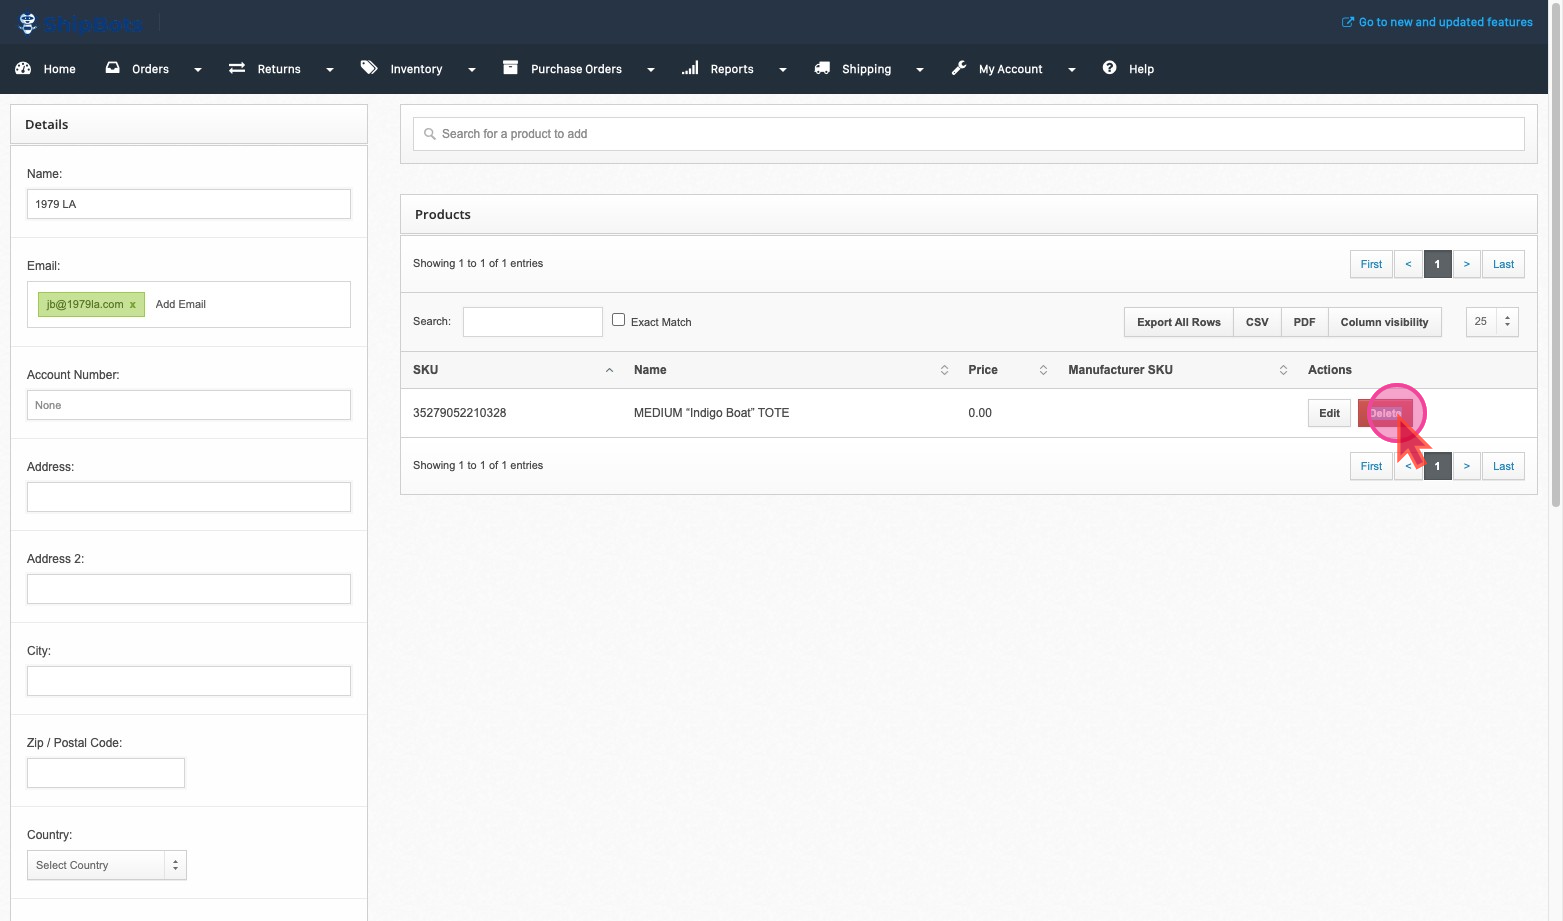
Select
Delete to remove product from Vendor.
Method 2: Via Product List Page
Navigate to Products:
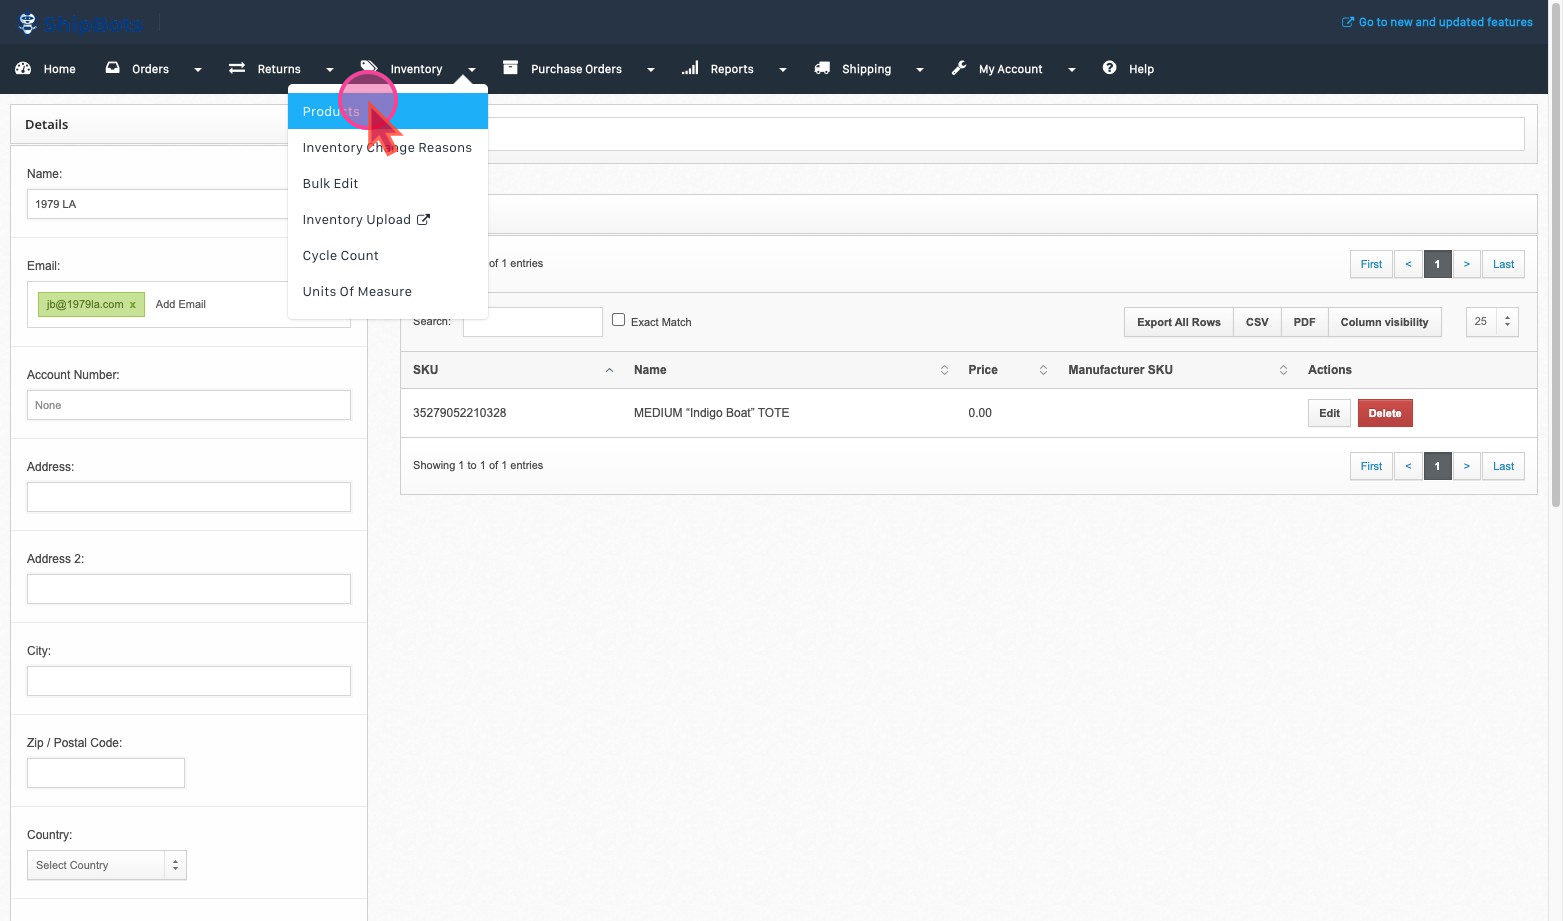
Click on the
Products link under the Inventory section.
Select Products to Manage Vendors:
Use the checkboxes to select the products you wish to associate with a vendor. You can choose multiple products at one time. Click on the
Manage Vendors link to proceed.
Choose a Vendor:
From the dropdown menu, select
Choose a vendor to associate the selected products with a specific vendor.
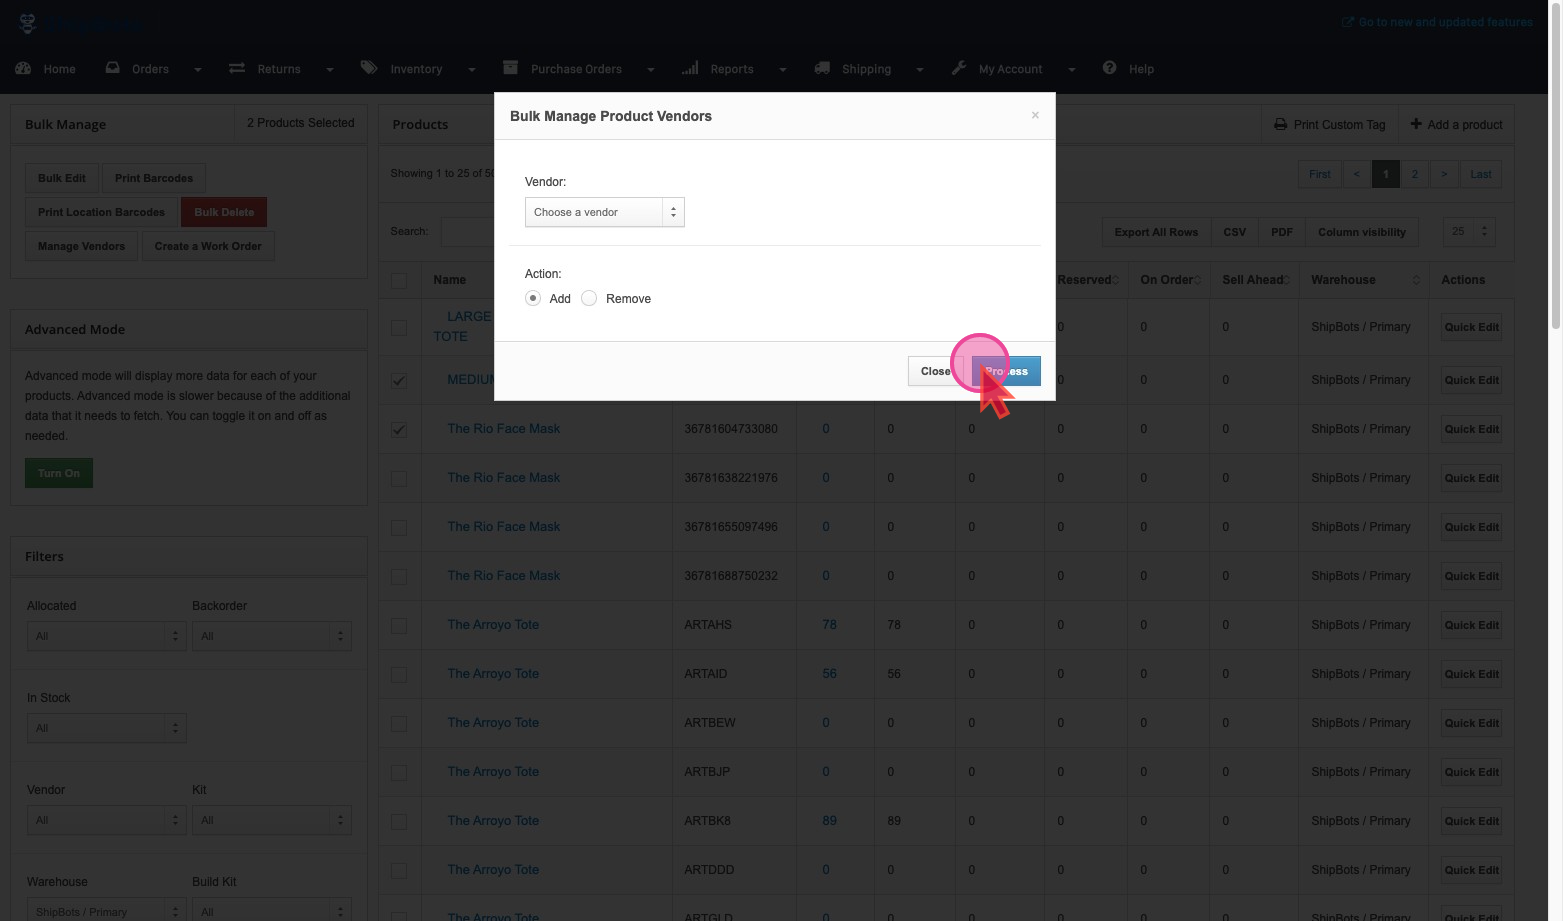
Review and Process:
Carefully review your selections and any highlighted notes or instructions. Finally, click the
Process button to complete the association.
Once you have followed these steps, you will have successfully added or removed products from a vendor in our application.
Did this answer your question?