Create a New Vendor
Learn how to add a new Vendor.
Introduction
Managing vendor information efficiently is crucial for inventory and order fulfillment processes. ShipBots provides a straightforward method to add new vendors to your system. This guide will walk you through the steps to create a vendor profile in ShipBots.
Access Vendors Page
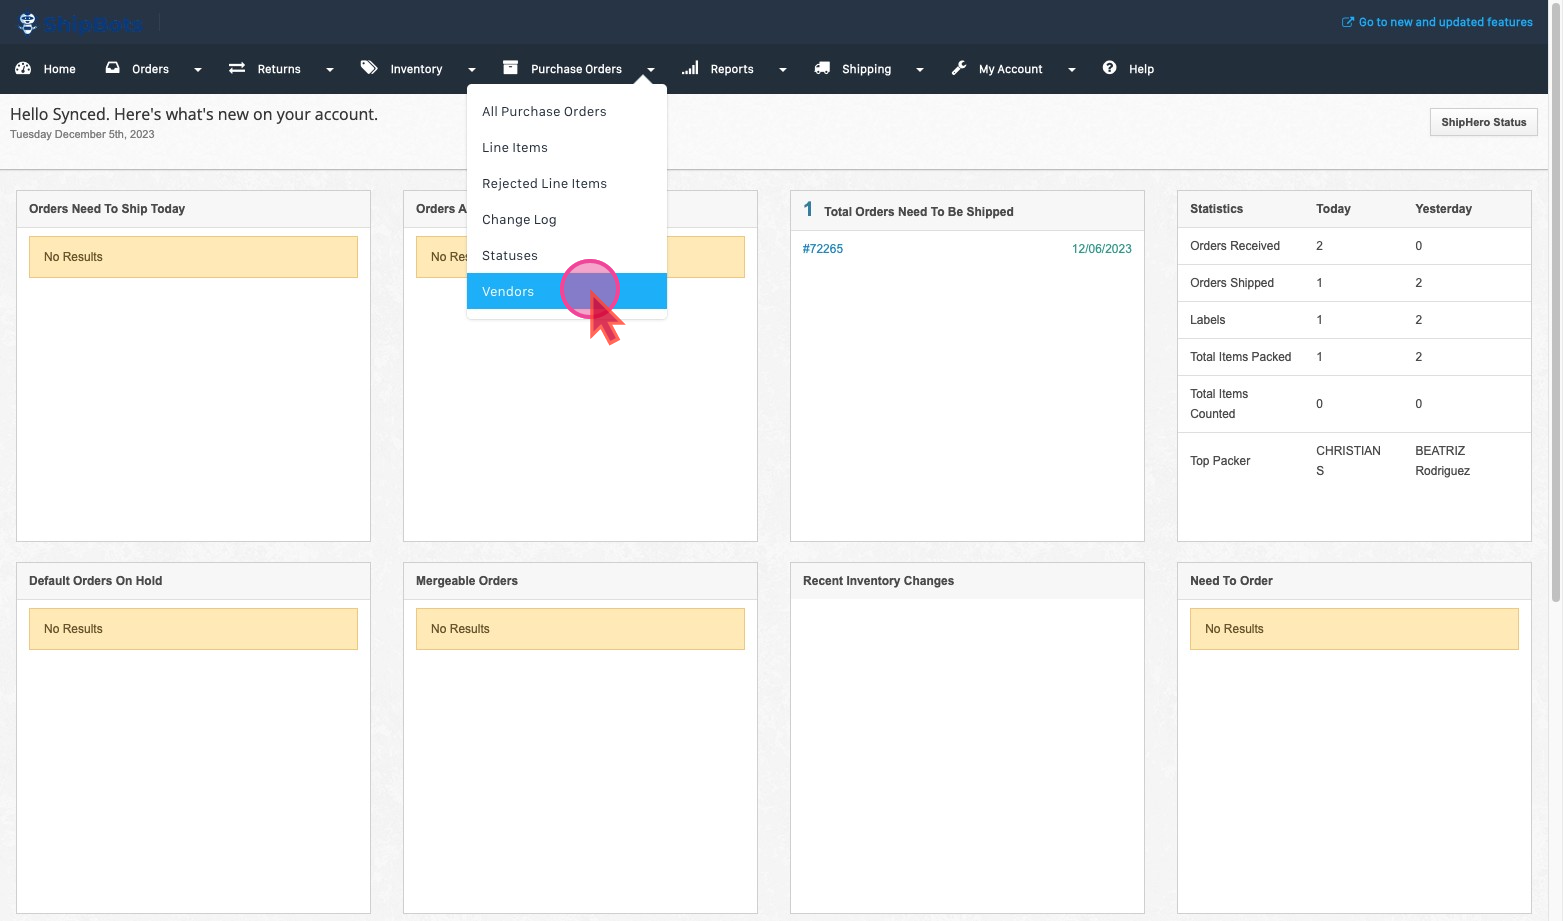
To begin, under the
Purchase Orders tab, click on Vendors from the dropdown menu to access your Vendors page.
Add a New Vendor
On the right side corner of the
Vendors page, find and click on the Add A Vendor button.
A window will pop up prompting you to fill in the new vendor's details:- Name: Enter the vendor's official name.
- Email(s): Add the vendor's email address. If there are multiple emails, separate them with a comma.
- Account Number: Input the vendor’s account number for reference and accounting purposes.
- Internal Note: Add any notes that may be relevant for internal use.
After verifying that all the information entered is correct and complete, click on the Save button to add the vendor to your ShipBots system.
.gif?table=block&id=41a9e18e-9589-486e-9ebd-e0add0d6e01a&cache=v2)
Did this answer your question?